Although Pinterest was initially a social media network that allowed users to share, save and manage pictures (also known as pins), Pinterest has now become an effective advertising network since 2014.
What this means is you can now get your products or content in front of more people as long as you have a marketing budget. Considering the fact that a majority of Pinterest users access the site to plan purchases and a majority have made a purchase after seeing the product displayed on Pinterest, getting a return on investment is highly likely if you know how to use Pinterest ads effectively.
Step 1:
The first step to get started with advertising on Pinterest is opening a Pinterest business account by following the prompts on business.pinterest.com. Should you have already created a personal Pinterest account, you can easily switch to a business account by going to: https://business.pinterest.com and clicking on “convert now”.
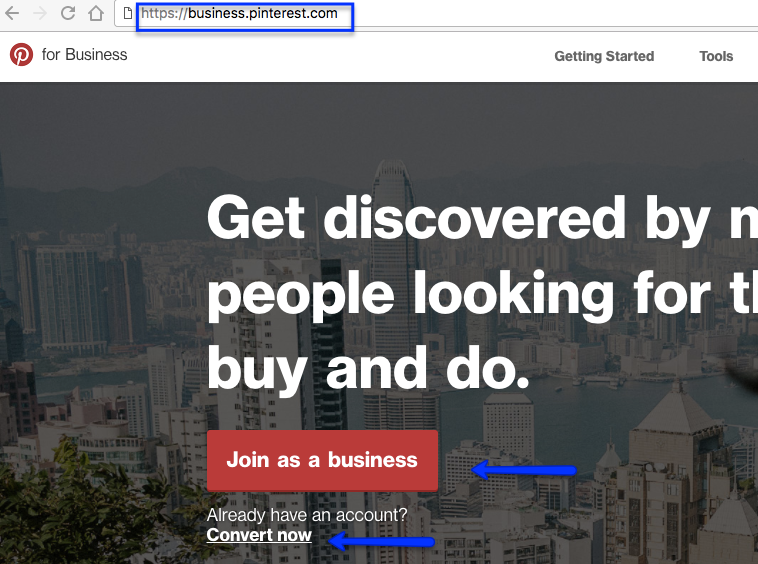
Make sure you set your account’s location as it will determine the currency you will be billed in and cannot be changed. Once your business account has been set up, to manage or create Pinterest paid ads, simply go to: ads.pinterest.com.
Step 2:
The second step is creating your advertising campaign. Campaigns help you categorize your different Pinterest paid ads. For example, should you be in the beauty industry and wish to advertise beauty products, you could set up a campaign per product you wish to advertise on Pinterest. You can also create campaigns according to your targeting. For example, you could have one campaign for ads targeting just women and another campaign for ads targeting just men. You can go even deeper, by creating a campaign per country you’re targeting. For example, a campaign with several ads targeting people based in Canada, and another one targeting people living in England.
Note, you can have an unlimited number of Pinterest ads per campaign.
Step 3:
The third step before even setting up your ads is knowing what goal you want to achieve. Your goal could be to build brand awareness, to generate more traffic, to capture more leads, to increase engagement or sell more products. Once you’ve identified your goal, you’ll know what your key performance indicator is (also known as KPI). For example, if your goal is to generate more traffic to your website, your KPI will be clicks. If your goal is to generate more brand awareness, your KPI will be the growth in audience size and the growth in engagement. If your goal is sales, your KPI will be the revenue generated, and so on.
Step 4:
The fourth step is to set up your ad. To set up your ad, go to ads.pinterest.com. This will take you to Pinterest’s advertising dashboard. The first section will show you analytics for your Pinterest paid ads. Total impressions means how many times your ad was shown. Total engagements is the total number of people who clicked on your ad to have a closer look at it, the number of people who liked the pin or commented on the pin. Total conversions is the number of people who either signed up to your offer by submitting their contact details if that’s what you are collecting or the number of people who actually bought as a result of seeing the ad.
Spend, is how much you’ve spent so far advertising your pin.
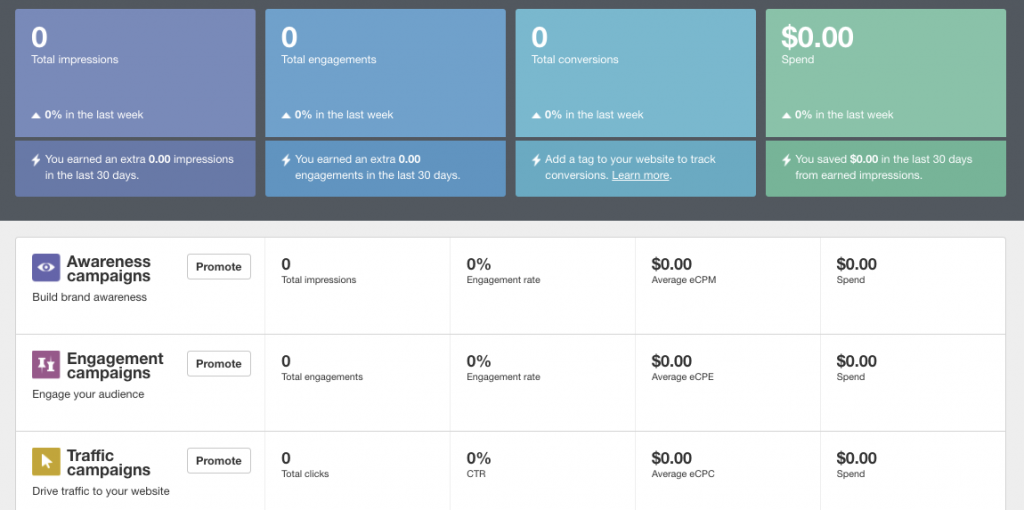
You’ll also see statistics for your ads broken down into categories. You’ll have statistics under “awareness campaigns” if you selected “building brand awareness” as a campaign objective. You’ll have statistics under “engagement campaigns” if you selected “building engagement” as a campaign objective. And, you’ll have statistics under “traffic campaigns” if you selected “traffic, sales or leads” as a campaign objective.
To create your ad, click on the “plus” sign on the top right hand corner. Then, choose your campaign goal, which can be either to build brand awareness, boost engagement, or get traffic to your website.
Then, decide how much you wish to spend in total for the entire campaign.
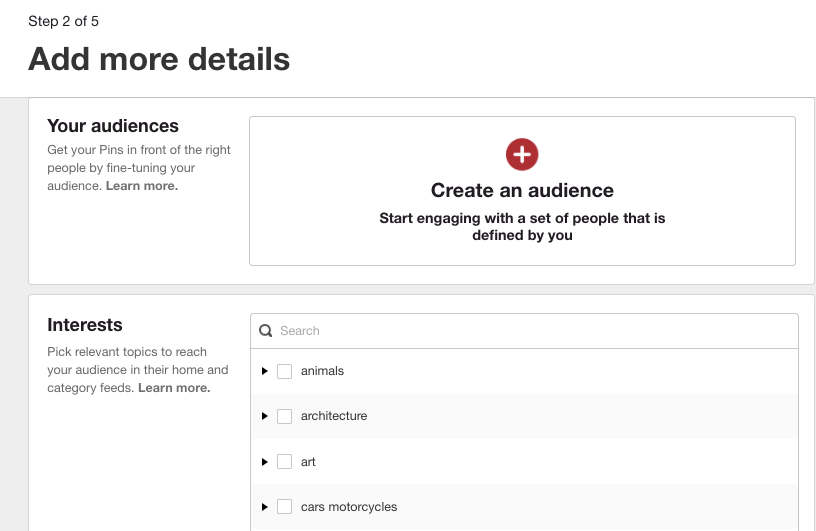
The next step is very important, it’s when you decide who you wish to advertise on Pinterest to. It could either be one of your existing audiences. In other words, visitors who went to your website, a list of customers you upload, people who already engaged with your Pinterest pins or “an actalike audience”. If you choose an ‘actalike audience”, Pinterest will match users who have similar interest and behaviours as one of your existing audiences.
Or you could choose to advertise on Pinterest to people based on their interests, keywords they type into Pinterest’s search engine, location, language, device they use to browse Pinterest, or gender.
Then make sure you decide on your maximum CPC click. Which means, the maximum amount you’re willing to spend every time someone clicks on your link.
The next step when advertising on Pinterest is selecting a pin you wish to promote. You will have to upload the pin to one of your boards before being able to use Pinterest ads.
Then simply follow the prompts which include providing your address, agreeing to the terms and conditions and your payment details.
At the moment, advertising on Pinterest is only available to people who live in the US, Canada or United Kingdom.
Step 5:
Once your campaigns have been running for a few days, track your ads by going to the advertising dashboard and checking which ads are performing best and stop running the ones that are underperforming. Make sure you also track your conversions. In other words, knowing exactly how many people out of all the people who saw your ad, actually converted into a visit to your website, or a lead or even a sale. To track these conversions, you will need to create what is called a “conversion tag”. In other words, installing a piece of code on the webpages you are sending traffic to, so it can track your conversions.
So I hope you’ve enjoyed this blog post on how to effectively use Pinterest ads in 5 easy steps. Remember to leave a comment below and subscribe to our Youtube channel to receive the latest social media tips straight to your inbox.
About the Author

Corinna Essa is known internationally as the go-to person when it comes to social media marketing.
Corinna owns a social media marketing company helping businesses around the world leverage the power of social media without doing any of the legwork. Her company has been featured in many media outlets including Sky Business news, Working Women magazine, Ymagazine, Tasmanian Times, Channel 7 and 101fm.
Corinna is also the author of 2 bestselling books “Money On Demand – The 16 Fastest Ways to Becoming a Millionaire Online” and “Reach: The SECRETS to converting your social media audience into your network marketing downline fast”
Recent Comments