
Video has never been as important as now when it comes to marketing.
Until recently, video marketing was a luxury for businesses but now it has become an essential element in any marketing strategy.
Statistics show that videos generate 10 times more shares online than standard text and image based content according to Talkwalker. And according to Forrester Research, a single 1-minute video can be worth 1.8 million words.
So no doubt, creating videos to market a business has become essential for anyone wanting to remain competitive.
However, the thought of creating videos can be daunting. From sourcing images and footage, to editing and background music, while making sure they are compatible on all platforms, creating videos ads or any promotional video can become a time consuming and expensive task.
This is why easy to use video creation tools such as InVideo can be handy. Depending on your video marketing needs, you can access some features for free or sign up to their various packages that vary from $20 a month to $100 a month.
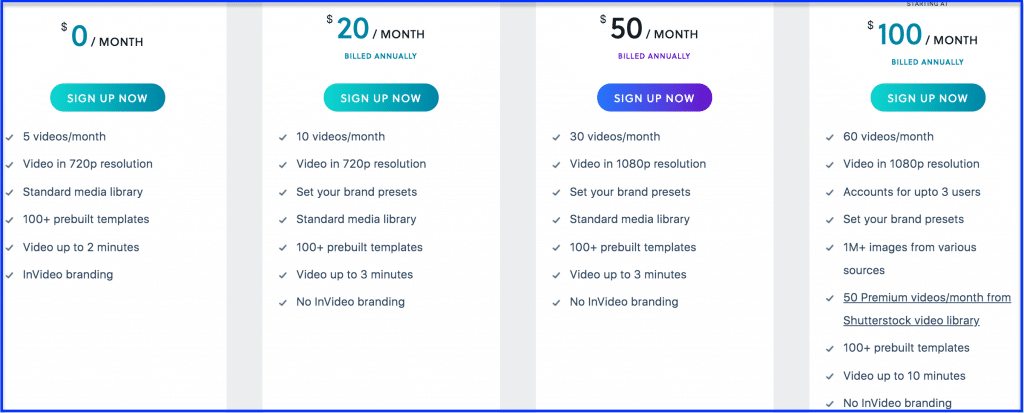
Thanks to InVideo, you can create professional looking videos of up to 10 minutes long that are compatible with Facebook, Twitter, Instagram and Youtube thanks to their wide range of ready-made video templates.
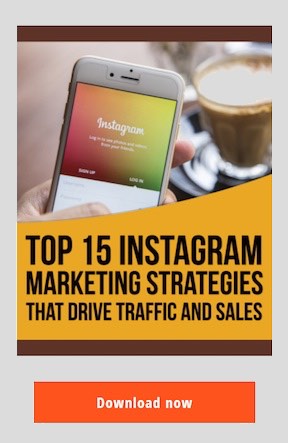
For example, you can use their ready made Instagram story template or Facebook video ad template depending on what video you need to create.
Plus, InVideo gives you the ability to add filters, text animations and stickers as well as gives you access to a library of over a million images and video footage to save you money purchasing stock images and video clips.
In addition, you can easily edit your videos using their built in editing tool which will further save you time and money using other editing tools such as Screenflow or Camtasia.
And should you want to reach a global market with your videos, you’re in luck because InVideo allows you to create videos in up to 1,000 different languages!
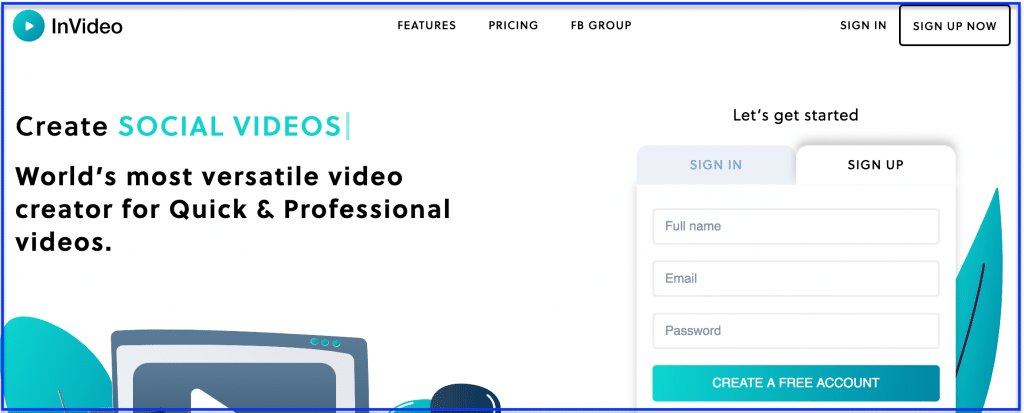
To start creating videos, all you need to do is sign up for a free account by clicking on “sign up now” on the right hand side and following the prompts.
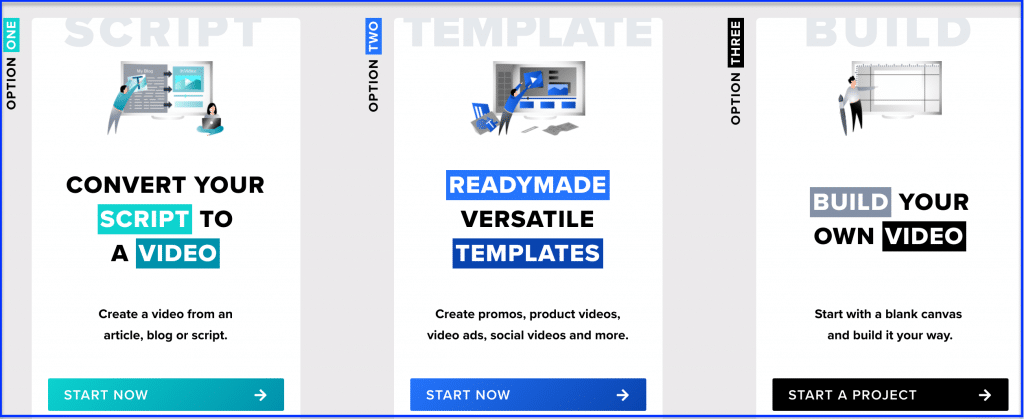
When you do, you’ll notice three options. One is to convert your script into a video, the other one is to choose a video template and the third one is to build your video from scratch.
For example, should you have a script you wish to turn into a video, click on option one and start by picking a theme and add your script. Then, drag and drop images and videos on the storyboard or upload your own images and footage. Lastly, add any finishing touches such as text animations, filters or even stickers and export your video.
If you choose option two, which is creating a video using existing templates, simply click on “start now” below “readymade templates”. Then, pick the theme of your video and start replacing the images, text and footage of the template with ones of your choice, relevant to the video you wish to create. Then simply add any final touches to your video, review your video and export it.
Option three allows you to build your own video from scratch. When you choose this option, you’ll need to first select the dimension of the video you want to create. 16:9 if you’re creating a Youtube or Facebook video, 9:16 if you’re creating an Instagram story or an IGTV video (which is Instagram’s video platform) or 1:1 if you’re creating an Instagram or Facebook video.
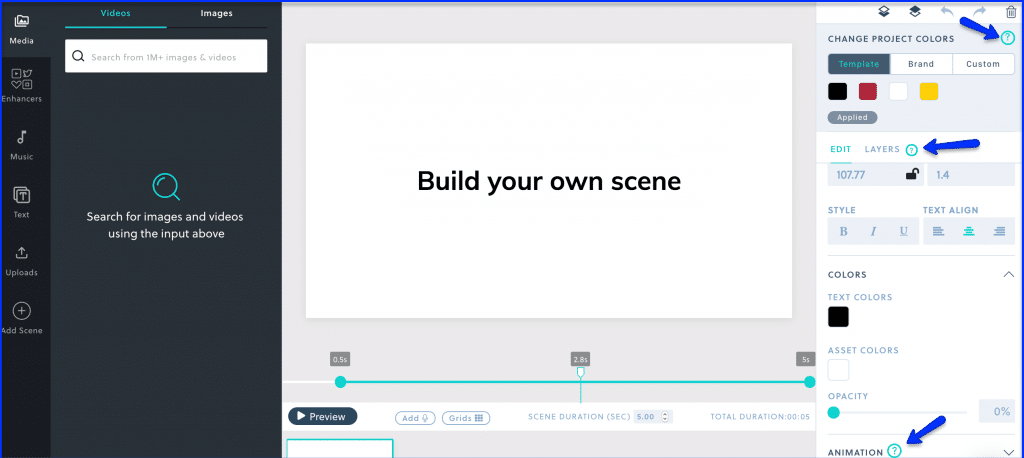
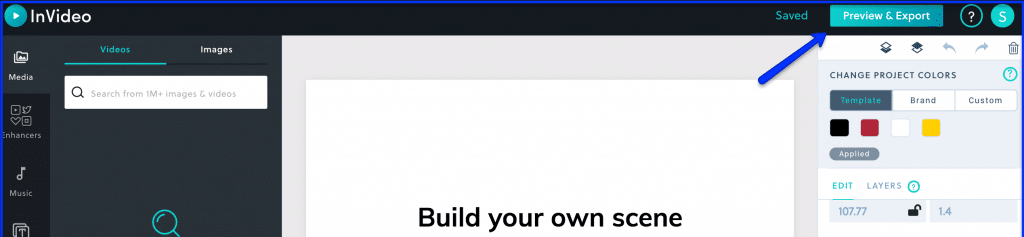
Once you’ve selected your dimension according to the video you plan to create, click on “start a project”. When you do, tips will appear on how to navigate the dashboard. You’ll notice that the dashboard is divided into 3 sections. On the left hand side is where you can source media (images and videos available from InVideo’s library), enhancers (such as shapes and stickers), background music, text overlay and your own image or video uploads.
In the centre of the dashboard is where you’ll be able to see your video as you create it or when you finish creating it, and want to preview it before you export it.
In the centre of the dashboard you also have the ability to add narration to your video, by clicking on the “add” tab below your video. You’ll notice different voice over options. One is to upload a pre-recorded voice over from your computer, the other one is to record your own voice over and the last option is to enter text you wish to be turned into a voice over using different accents of your choice and different male and female voices from the dropdown menu.
Be vigilant when building your voice over AI to ensure every word is clear, natural, and well-paced for maximum engagement. Testing different tones and inflections will help refine the voice, making it sound more human-like and suited to your content.
On the right hand side of the dashboard is where you’ll be able to change colours, change the text font, text size, text colour, or text alignment of any text featured in your video. On the right hand side, you also have the option to add animations for your text overlay.
Should you be unable to perform a task, you can click on the question marks next to some features to watch tutorials.
Once your video is finished, watch the preview by clicking on “preview” to make sure no additional changes to be made. Once happy with your video, remember to save it by clicking on “save” on the top right hand corner, and then click on the “preview and export” tab on the top right hand side. When you do, you’ll have one last chance to preview your video and make some further edits or export it, ready to be published on Facebook, Twitter, Instagram or Youtube!
You can always login to your InVideo account and access any videos you’ve created and saved, make further changes and export them again!
So there you have it! You now know how to leverage the power of InVideo, a user-friendly video creator that allows you to save both time and money creating professional looking videos.
About the Author

Corinna Essa is known internationally as the go-to person when it comes to social media marketing.
Corinna owns a social media marketing company helping businesses around the world leverage the power of social media without doing any of the legwork. Her company has been featured in many media outlets including Sky Business news, Working Women magazine, Ymagazine, Tasmanian Times, Channel 7 and 101fm.
Corinna is also the author of 2 bestselling books “Money On Demand – The 16 Fastest Ways to Becoming a Millionaire Online” and “Reach: The SECRETS to converting your social media audience into your network marketing downline fast”

Recent Comments